In a world where digital communication has become the norm, screen recording has moved far beyond simple tutorials. Professionals record webinars and presentations, gamers capture highlights, educators prepare visual lessons, and everyday users save meaningful moments from their screens. But one challenge remains consistent across all scenarios: sometimes you don’t need the whole screen—you just want a specific portion of it.
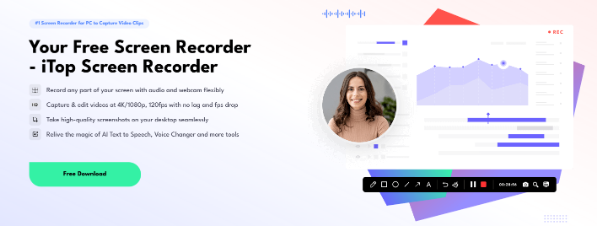
That’s where iTop Screen Recorder excels. Known for being one of the most user-friendly and flexible screen recording tools for Windows, it enables you to capture exactly what you want, in the quality you want, without performance drops or complicated configuration.
Before diving into how to capture a specific region of your desktop display, let’s look at the key features that make iTop Screen Recorder a standout solution for Windows users.
Why iTop Screen Recorder Has Become a Go-To Tool for Windows Users
iTop Screen Recorder offers a balanced combination of simplicity, flexibility, and professional-grade capabilities. Whether you’re an experienced content creator or a complete beginner, its powerful features help you record smoothly and edit effortlessly.
Here are several highlights based on the product capabilities shown in the interface:
1. Flexible Recording of Any Part of Your Screen
iTop Screen Recorder allows you to capture any part of your screen—full screen, specific windows, or a custom-defined region. This flexibility makes it suitable for:
- Recording only the portion of a webpage
- Capturing tutorial steps without showing sensitive information
- Highlighting a specific application area
- Focusing on software demonstrations
Whether you’re preparing training videos or saving a portion of a livestream, the tool gives you full control over the recording area.
2. 4K/1080p, 120 FPS Recording Without Lag
High-resolution recording is essential for professional creators. iTop Screen Recorder supports:
- 4K recording
- 1080p Full HD
- Up to 120 FPS
- Stable performance without frame drops
This high-quality output is invaluable for video creators, educators, gamers, reviewers, and businesses producing polished visual content. What sets it apart is its ability to maintain smooth performance thanks to lightweight system consumption and an efficient recording engine.
3. Seamless HD Screenshots
Beyond video recording, iTop Screen Recorder also offers a convenient screenshot tool. Users can capture clean, high-quality images from their screens at any moment during work, browsing, or gaming.
This is particularly useful for:
- Saving notes from online meetings
- Creating annotations for tutorials
- Capturing design or UI elements
- Documenting steps during troubleshooting
Screenshots are instantly saved, making multitasking easy.
4. AI Tools: Voice Changer, Text-to-Speech & More

iTop Screen Recorder includes a suite of AI tools that enrich your content creation experience:
- AI Text to Speech – turn written scripts into natural-sounding narration
- AI Subtitle tools – generate captions for clearer communication
These features are invaluable for content creators who want to enhance storytelling, keep audiences engaged, or protect their identity online.
Why Capturing a Specific Screen Region Matters
While full-screen recording is useful, many situations demand precision. Capturing a specific region helps you:
- Maintain privacy by hiding unrelated content
- Reduce distractions and focus the viewer’s attention
- Save editing time since you only record what you need
- Record tutorials step by step in a clean and organized way
- Maintain file size efficiency by reducing unnecessary visuals
From educators preparing lessons to employees sharing quick demonstrations, selective region capture keeps recordings clean and professional.
How to Capture a Specific Region of Your Screen with iTop Screen Recorder
Now, let’s walk through the exact steps to record a chosen part of your screen using iTop Screen Recorder. The process is incredibly simple, making it accessible even for first-time users.
Step 1: Download and Install iTop Screen Recorder
Start by visiting the official website and downloading the Windows version. Installation is quick and straightforward—just follow the on-screen instructions.
Once installed, launch the program. The interface is clean, intuitive, and designed to help you get started immediately.
Step 2: Choose the Recording Region
This is where iTop Screen Recorder truly shines.
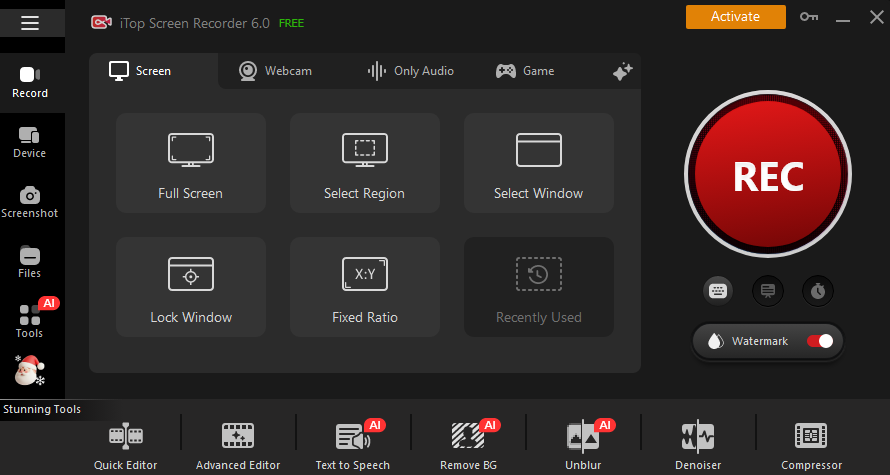
- In the main interface, locate the recording area selector next to the “Full Screen” option.
- Click the drop-down menu.
- Choose Select Region.
- Your screen will dim slightly, and your cursor will transform into a selection tool.
- Click and drag to outline the exact area you want to capture.
You can adjust the edges or reposition the rectangle until it perfectly frames your intended content.
This allows you to record:
- A small app window
- A specific portion of a browser
- A portion of a video stream
- A highlighted taskbar or sidebar element
Once selected, the region will remain active until you modify it again.
Step 3: Configure Audio and Webcam Options (Optional)
If your recording includes narration, system audio, or webcam overlays, you can enable them with a single click:
- Microphone – for voiceovers or commentary
- System Audio – for in-app sounds, game audio, or videos
- Webcam – for picture-in-picture tutorials
These settings are accessible directly from the main interface without navigating through complex menus.
Step 4: Start Recording
With your region selected, simply press the REC button. After a short countdown, iTop Screen Recorder begins capturing exactly what’s inside your selection box.
During recording, you can:
- Pause the session anytime
- Resume without creating a separate file
- Add annotations (if supported in your version)
Every action is smooth thanks to the low-overhead recording engine.
Step 5: Stop and Save Your Video
When you’re finished, click Stop in the floating toolbar or use the default hotkey.
Your recording is instantly saved and accessible in the built-in media library. From there, you can:
- Preview your video
- Trim unwanted parts
- Rename and organize your content
- Export in multiple formats
iTop Screen Recorder keeps your workflow efficient from start to finish.
Extra Features That Enhance Your Recording Experience
iTop Screen Recorder isn’t just a recorder—it’s a complete content creation toolkit. Here are a few additional features that make it even more powerful for selective region capture:
AI Editing Tools
Generate subtitles, change voice styles, or use AI text-to-speech to create polished videos with minimal effort.
4K Export Without Quality Loss
Maintains crisp visual clarity even for small screen regions.
Lightweight System Impact
Record smoothly without slowing down your system—perfect for detailed tutorials or gameplay clips.
Free to Use
You can access most core features for free, making the tool ideal for students, educators, professionals, and creators.
Final Thoughts
Capturing a specific region of your screen shouldn’t require complicated software or high-end hardware. With iTop Screen Recorder for Windows, the process becomes simple, efficient, and incredibly flexible.
From 4K recording without lag to AI-powered editing tools and easy region selection, iTop Screen Recorder gives users complete control over their recordings—making it a perfect choice for productivity, content creation, education, gaming, and everything in between.
If you’re ready to record only what matters and keep your content clean and focused, iTop Screen Recorder is the tool that helps you do it effortlessly.